Skip to content

DIY Summer Dress (With Tutorial For Making Dresses More Modest)

So I was shopping at a thrift store yesterday and came across one of the most beautiful dresses ever! It was long and Grecian, a beautiful fiery orange, and it fit pretty well too. There was only one problem... it wasn't quite modest. The front and back necks were low and awkward.

But was I going to leave it there?

No!!!

(Is that even a question? ;-) )

So I purchased it, took it home, admired it, put it on again, and put it back in the bag. And then this afternoon, I was in a bit of a slump. I had three really big writing projects, but my brain was like "I don't ever want to think about them ever again!!!" and went on strike. So I pulled out the lovely dress and a measuring tape, turned on one of my favorite podcasts, and got to work.

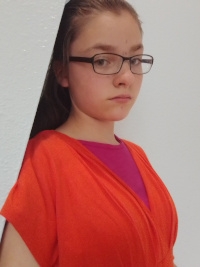
BUT FIRST... the "before."
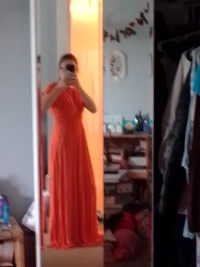


with a shirt on underneath for modesty


AND NOW... the process.

In a world where it's hard to find a dress that (a) fits, (b) is cute, and (c) is modest, learning how to do some DIY sewing projects is a great skill to have! I took some photographs of the process in hopes that you can do this too.
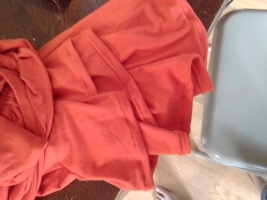


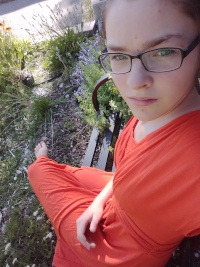
So I don't know if you noticed in the first photograph, but the dress is about 7" too long for me. Which is fantastic! The first step was to cut off the excess fabric (save it! It's important!), and sew a new hem.

PAUSE: In this tutorial, I'm assuming that you want the dress all the same color. That's why we're saving the bottom strip - because it can be used to patch up the front and back necks. If you don't want the same color, go find a scrap that has the same characteristics (same weight, same weave, hopefully the same washing instructions, etc). Or if you do want the same color, but don't have fabric to spare... good luck. A trip to the fabric store is definitely in order. Bring the garment along so you can get a close match, but getting a good one isn't guaranteed.
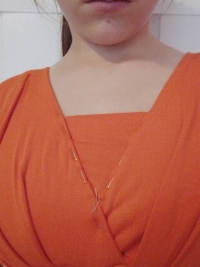


I didn't take enough pictures for this step... so... yeah. Take a square of fabric, about two inches taller and four inches wider than you will need to cover the low front neck. Fold in half and mark that vertical center line with pins. Unfold and place the right side against the wrong side of the dress (which should be insided-out at this point). Then, carefully keeping it centered, mark in place. Once you think you've got it, right-side-out the dress and take a look. Good? Fantastic! Take some more pins and pin the square from the right side. So you'll have two sets of pins in for a moment... then take out the ones that you put in while the dress was inside-out. Then, VERY CAREFULLY, try it on and take a carefully look in the mirror. Repeat the entire process until it's perfectly located. Then you can move on to the next step.

PRO TIP: when you're pinning the top of the insert, stretch the fabric a little. This will help prevent a gaping neckline, which is never fun.
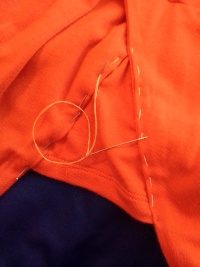


Now you're going to remove the dress and baste the front insert in place. You can remove the pins now.
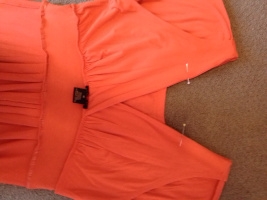


Now you can move on to the back insert! Measure how tall you need the insert to be and mark where the top will be with pins.
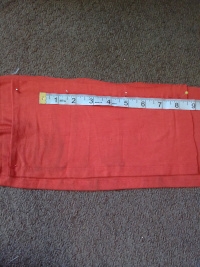


Now it's time to cut out the back insert. You're going to cut out two pieces, each one a few inches taller than you need and 2.5 inches wider than you need.
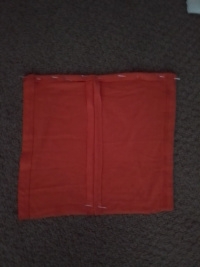


Put them back-to-back, right sides together. Sew a vertical seam about a 1/2" away from the edge. Pin a top hem, but don't sew or baste the actual seam yet.
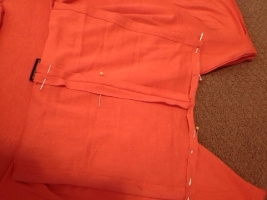


Repeating the process used for the front insert, pin the back insert in place. Keep the seam centered.
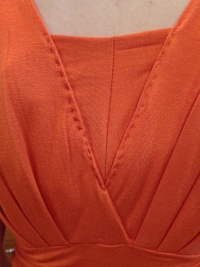


Now baste the back insert in place.

PAUSE: make sure you can put the dress on over your head! If you can't, no worries, there's allowance for that built into the back insert. Remember that center back seam? If you need, you can unpick that and insert a zipper, or some hook-and-eyes, buttons, whatever. Just one thought: probably not Velcro. Now is the time to add in that back closure!
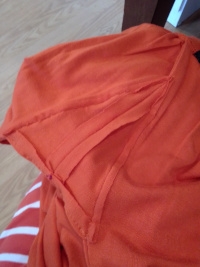


Now go to the sewing machine and sew in the front and back inserts over the baste stitches. If you've made sure you can get the dress on (including adding a back closure if needed), you can also hem the top part. Finally, trim the squares away about a 1/4" away from the seams. Assuming you're working with something that doesn't fray. If it does fray, I would trim the squares away about a 1/2" away from the seams, and then serge, bind, or hem them. Serging would be the least bulky option, I think.

And there you go! Now you have a cute dress that fits and is modest. Yay!

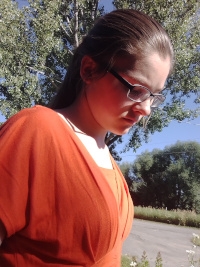
FINALLY... the fashion show ;-)


Operation BIXA Shirt

I made myself a shirt! I LOVE how it turned out. I've already worn it twice, and it's incredible! It's fits well, the fabrics are so soft, and the colors... it's a match made in heaven! And it was for a school project... #TwoBirdsWithOneStone

Pattern: BIXA, by MoodFabrics (free sewing pattern!)
Time: 7 hours, counting shopping/photo shoot
Satisfaction: 10/10

Here is the front!
I did not use the original BIXA pattern; I made view A but added in the lovely ruffles in the sleeves and also the peplum. Altering that pattern was a bit nerve-racking!


And here it is from the back! I love how the magenta and zebra striped fabric go so well together!


The ruffle -- the most nerve-racking part of the entire project!


From the side... again, I can't believe how well the two fabrics go together!


Me as a super model ;-)


Also me as a super model...


Twirling in my new shirt...


PS. Thanks to my wonderful Mom for taking pictures!

Plans For My Etsy Shop, Foxtrot, Hinge Point, and Brownie Bites

Hey guys!

It's been forever since I last posted, which I'm really sad about. Today I am going to share what I've been up to lately.

Etsy
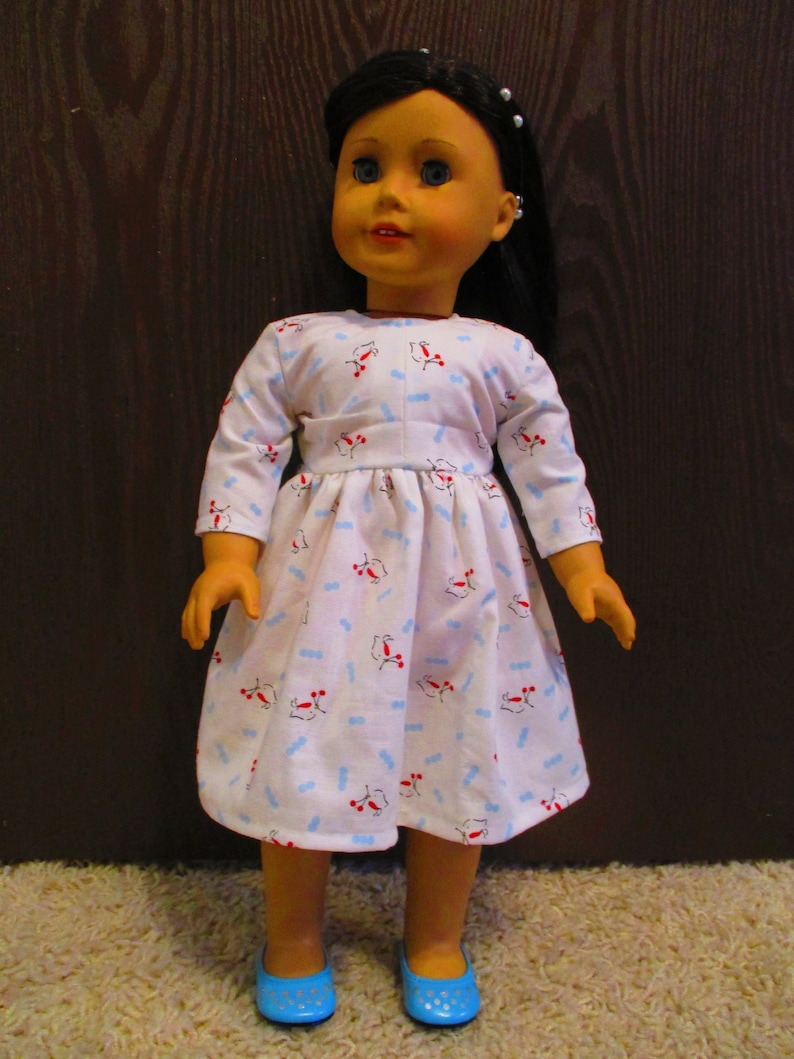
Just today, I added a new listing to my shop, which you can find here. It's for faux-denim dresses with red contrast stitching, designed to fit AG or other similar 18" dolls. It's modeled by Elisabeta, and her friend Jasmine (thanks, Madeline!).

I'm planning on making a lot of spring-time clothes, from floral dresses to embroidered jumpers to skirts and blouses!

And coming soon, hopefully before the middle of March, pdf patterns! I have such fun drafting my patterns, I thought, why not sell some? They could be cheap, and since their digital, it's an instant download, meaning I don't have to ship anything.

Foxtrot
During the in-person days at LAU, I'm taking a ballroom dance class. It's a lot of fun! So far, we have been learning the foxtrot, and now we are starting to learn east swing, AKA triple step swing.

Hinge Point
Another fun thing I've been doing is listening to Hinge Point! It's a new musical group, composed of three sisters, with fantastic voices! Their music is clean, and uplifting, and fantastic!

Brownie bites
Detoxinista has this great recipe for brownie bites. They're super health-nut-ish, but they're surprisingly good! I've probably made them six or more times in the three-ish weeks since I discovered the recipe.

(November) Journal Entry #2

Man, it's been a long time since I've posted! And a lot of things have happened.

I've made several garments, crocheted a hat and scarf, tried in vain to crochet a sweater (my problem is I was trying to make up a pattern as I went, since I couldn't find any cute, simple, and free crochet patterns), bought some adorable fabric (for a dress and a twin sweater set), set up an Etsy shop, and felt totally jipped when Governor Herbert made another state wide mask mandate.

Other than that.......... life is "normal." I am kinda getting used to the whole CoViD19 "crisis," but I'm not sure whether or not that's a good thing!

Anyways, this post is basically just to say I'm really busy, I want to start posting more, and I have some great crafts planned. So see you later!

Pecan Pie

So a week ago or so, I made a pecan pie. And I still haven't told you guys? I'm sorry, I'm really behind in posts. I've made three new garments, and an accessory, as well. Oh, and my Etsy shop is up. And life has been really busy, so I haven't had time to write about it.

Alright, about the pie:

I used Detoxinista's recipe for pecan pie, and it was amazing!

It's very simple, and relatively healthy! Well, for a desert.

Changes I made: I used 3/8 cups honey and 3/8 cups maple syrup instead of 3/4 cup maple syrup.

This is the pecan pie I made. I used Detoxinista's filling recipe, and a pat-a-pan piecrust recipe that my mom has.

Camp Na-No-Wri-Mo Progress

Goal: 65,000 words.
So Far: 46,640 words.

71% of the way there

Update: I didn't write 100% of my goal during the month of July (I got 55% of the way there), but I'm still going to finish it, hopefully by the end of September.

Estimated End Date (Last updated, September 9): Undetermined

Fashion Shoot With Elisabeta: One Base Outfit, Many Looks

Hey guys, long time no see!

Even though I posted just last Friday, it feels like I haven't posted in forever, since I usually post almost daily.

Today I decided to do a fashion shoot with Elisabeta. I took one base outfit (black slacks, white blouse) and used accessories and hairstyles to get different looks out of it.

It was a lot of fun, and I think I would like to do this with myself soon!

I started with one base outfit and eight accessories: shoes, hair things, layering pieces, bags.


Outfit one: base plus a double-sided blazer, sandals, and a skinny braid in her black hair.


Outfit two: same base, plus the double-sided blazer, her gray scarf used as a headband, and white and black sneakers.


Same base and headband and shoes, now with a scrunchie, and purse.


Outfit four: same base and sneakers; now with a floral hair clip, and her scarf tied around her neck.


Outfit five: same base and clip and sneakers; now with her scarf tied around her waist as a belt.


Same base and shoes, now with a scrunchie and purse; in her hair is a pearl headband.


In the last outfit, we have the same base and shoes, and the purse.

Elisabeta says, "Don't I look like I could be the next Madam President? Maybe I should join the 2020 race!"

July Journal Entry #1

Hola, folks!

Alright. It's been a while since I've posted... so I'm going to catch you up to date.


Wednesday, July 1
Wednesday was pretty ordinary. I worked on my Camp Na-No-Wri-Mo novel, and wrote about 4,300 words (my goal for Wednesday was 3,716). I ate, I slept, and basically just wrote my novel. Oh, and my bedroom floor was almost clear. :-)

AND I put thorn guards in my bike tires... almost all on my own! ~listens to applause~


Thursday, July 2
Yesterday was sort of an adventure. I wrote in my book (about 2,500 words of my 3,716 words goal), I ate, I drank a lot of water, I did some extra work for money, I weeded in our family's garden.

I also wrote and sent out The Young Scholar's Gazette (a little bi-monthly magazine I do just for fun that I send to a few of my friends), which took me like three hours and is why I didn't make my word count goal.

And then in the evening, I made some doll shoes!


We will now talk about doll shoes.

So, I used a pattern by HappyBankkyCraftyMom and foam I got at HobbyLobby, a hot glue gun, and cardboard I found in our recycling box.

(looking everywhere for my camera so I can take pictures of the really cute doll shoes I made)

(finally found my camera)

Elisabeta's blue shoes! She absolutely adores them. I think they are her favourite summer shoes.
Okay, so I made a darkish-grayish blue pair first. I really like how they turned out, and I love the pattern! Really easy to use, with a simple and classic design.


The white shoes are SO impractical, but they're still really cute!
The second pair are white with pom-poms for a fun touch. A bit more playful, they are also not that great to play in because they are white (what on earth was I thinking of?) but that's fine because Elisabeta doesn't really play that much. She likes reading, writing, making sarcastic comments, looking beautiful, and taking naps. She definitely doesn't like mud.

A Solemn Declaration Regarding Camp Na-No-Wri-Mo

Let it be known, I am participating in Camp Na-No-Wri-Mo! (squeeeee!!!) For my project, I shall write a 65,000 words long first draft of a book which I hope will be the first in a trilogy(!!!). I have from July 1 to July 31 to complete this outrageously hard and outrageously awesome challenge!

And let it be known, I have signed the following pledge(found in a Na-No-Wri-Mo middle-school work book (I'm not a middle-schooler! I'm 15!)):

I hereby pledge my intent to write a novel in one month.

By taking on this absurd month-long deadline, I understand that notions of craft, brilliance, grammar, and spelling are to be chucked right out the window, where they will remain, ignored, until they are retrieved for the editing process. I understand that I am a talented person, capable of heroic acts ( :-) ) of creativity, and I will give myself enough time over the course of the next month to allow my innate gifts to come to the surface, untouched by self-doubt, self-criticism, and other acts of self-bullying.

During the month ahead, I realize I will produce clunky dialogue, clichéd characters, and deeply flawed plots. I agree that all of these things will be left in my rough draft, to be corrected at a later point. I understand my right to withhold my manuscript from all readers (except possibly my teacher) until I deem it complete. I also acknowledge my right as an author to brag about the quality of the rough draft and the rigors of the writing process, should such bragging prove useful in garnering me respect, attention, or freedom from household chores ( ;-) ).

I acknowledge that the month-long goal I set for myself is both wildly challenging and totally achievable, as long as I let no Evil Inner Editors, outside distractions, or normal bedtime hours ( ;-) ) stand in my way. I also acknowledge that, upon successful completion of the stated writing objective, I am entitled to a period of gleeful celebration lasting days, if not weeks, afterward, and moreover, should I fail to reach my goal, I am entitled to a well-earned break after which I will try again.

(signed, Liliana K Owen)

YAY!!!

I Hereby Dedicate Today

Let it be known unto all ends of the earth, that I, Liliana, do dedicate this day to the making of pants. The cause being, the clothing stores I like are still closed, and I only have one pair of pants that fit me, and one pair DOES NOT CUT IT.

This consists of: learning how to draft a pants pattern, fine-tuning the pants pattern, and then sewing a pair of pants.

I know that task will be difficult, but I will not quit until I have a new pair of pants that fit me perfectly hanging in my closet.

Liliana

PS. Weird, right? Well, one has to commit in some way!


Update at 2:35 PM

After working on pants all day, I have finally drafted the perfect pants pattern! Squee!

Monthly Personal Meetings

Monthly Personal Events are a powerful stepping stone to translating everything you got from your Annual and Semi Annual Personal Meetings into a reality.

For a Monthly Personal Meeting, you are going to need a notebook and pen, a quite location (like your house, early in the morning), and a brain that isn't fogged up with sleep.

You are going to review your summaries from your Annual and Semi Annual meetings, then take the time to be brutally honest and answer the following questions:

1. What do I need to do, this month, to achieve my dreams?
2. Do my routines need altering?
3. Am I living life as intentionally as I could be?
4. How have I done in achieving last month's goals?
5. What obstacles am I encountering, and what am I doing to combat them? How effective are my efforts to combat them?
6. What should I be doing to combat them?
7. What fears are holding me back that I need to conquer?
8. Is my life on track?
9. What events are happening in the next month?

When you finish answering those questions, take the time to write a nine paragraph summery of your notes.

Please take the time to do this well! Take the time to write out your thoughts. Be brutally honest. Face and accept the truth and plan how you can do better next time.

Of course, the Monthly Personal Meeting is nothing without the Weekly Personal Meeting.......

Semi-Annual Personal Meetings

In my last post, I discussed yearly-personal meetings. They are your large scale meetings to determine what's up and what matters.

In your semi-annual meetings, you are going to reevaluate your life, see if you're on track to accomplish everything you determined to accomplish in your annual meetings and see if it perhaps is necessary to change your annual plan. Maybe something big came up, like a life-changing diagnosis in your family that is turning your world upside down. Or a pandemic started. Or a pandemic died off. Or a loved one's death. Or, you know, something major that is changing your life. Maybe it changed your values, or your responsibilities (and thus your time), or perhaps you realized that maybe, your focus for the year is what you thought it "should" be, not what you actually want it to be.

Semi-annual meetings will happen twice a year, in spring (March, April, May or somewhere around there) and in fall (September, October, November or somewhere around there). In order to complete this meeting, find a notebook and pen, a water bottle, an hour or two of uninterrupted time, and a location without SCREENS, MUSIC, LOUD NOISES, or other DISTRACTIONS.

Then take the time to answer the following questions with horrific honesty:

1. How am I doing in achieving what I said I'd achieve in my annual meeting? Am I on track to achieve all my goals?
2. Was I completely honest about what I needed to drop, start, or achieve?
3. Does my plan need altering?
4. What are the biggest obstacles to me achieving what I said I'd achieve?
5. How can I overcome those obstacles?
6. What do I need to do in the next six months?
7. What do I need in the next six months?
8. How can I fulfill those needs?
9. What big things are going to happen in the next six months that will require my time and attention or an altering of my schedule (for example, family reunion, trip to Hawaii, or a one-week camping trip with your family)?


It should take you about two hours, give or take a little, to do so. When you finish, take the time to reflect upon what you've decided, sum up your plans and thoughts, and decide what the "next right thing" to do is.

And then you're done!

Of course, the Semi-Annual Personal Meeting is absolutely useless without the monthly personal meeting... stay tuned for how to do that next post!

Questions on how to do a Semi-Annual Personal Meeting or why it matters? Comments? Experiences with personal meetings? Please comment below and I will get back to you in 1-2 days!

Yearly Personal Meetings

You know, there is a problem with society today.

They don't know what they want, and if they do know what they want, they either (a) don't take steps to get it OR (b) don't know how to get it.

Enter, personal meetings.

In order to maximize personal meetings, they should happen at the following times:

~At the start of the year
~Start of spring and start of fall
~At the beginning of the month
~At some regular, schedule time once a week.

Sounds like a lot to add to your plate? On the contrary, it will SAVE YOU TIME, help you realize what REALLY MATTERS, and allows you to PRIORITIZE, PLAN AHEAD, and CHECK IN with yourself.

So although this isn't the start of the year, today I am going to discuss the YEARLY PERSONAL MEETING.

For the yearly personal meeting (which actually doesn't HAVE to be at the start of the year, it could be before school starts, in the middle of the summer, whenever works for you as long as you are CONSISTENT about it) you are going to find three hours, a notebook and pen, a water bottle, and a quite location without SCREENS, LOUD NOISES, MUSIC, or SNACKS.

Then you are going to get yourself situated, open up your notebook, and set an alarm for three hours later. Then don't look at the clock/alarm and take ample time to be brutally honest with yourself and answer the following questions:

1. How is life going right now? Good/bad? Why/why not?
2. What has been your biggest achievement this past year?
3. How have you changed this past year?
4. What do you want to do better this next year?
5. Is your life going in the direction you want?
6. What do you want with your life?
7. If you have one, now is the time to review/edit your mission statement. If you don't have one, now is the time to make one.
8. What are your passions?
9. What do you want to accomplish this next year?
10. What do you need this year? What needs of yours are unfulfilled?
11. What steps can you take towards fulfilling those needs?
12. What are your priorities?
13. Is there anything you need to drop?
14. Anything you need to add?

When the alarm beeps, you can be done, or keep going. Three hours should be enough to answer all those questions (that is 12.857 minutes per question), but if it isn't keep going.

If you finish before the three hours finish, take the time to pat yourself on the back, and then start reviewing your notes, adding in anything you think of.

By the end of the three hours, you should have a lot of notes, a few doodles, and a soul-wrenching period of self-honesty (yay!).

Well, now what? The yearly personal meeting is useless if you don't sum it up in fourteen paragraphs (one paragraph per question), which should give you a general idea of what you need to do and focus on this year.

And then, of course, you need to act on it.

But... again... the yearly personal meeting is completely and utterly useless if you don't follow it up with the semi-annual meetings, the monthly meetings, and the weekly meetings.

I will describe those meetings and how important they are in later posts... next one coming soon, maybe later today.

Questions/comments about the Annual Meeting? Please comment below and I will get back to you in one or two days. :-) See you in the next post!

More Delicious Cookies

Greetings.... I have been off my blog for a comparatively long time, because I've been extremely busy. But we're back on schedule now!

So today I was bored silly and decided to try a new recipe.

It's a chocolate chip recipe that is processed-sugar free (assuming you use RAW honey...) and it's so good!!!!!! :-)

Because my family eats (mostly) dairy free, I made a 1-to-1 substitution of butter for coconut oil, but you don't have to.
Photo by ME
Also, as you can probably see from the photo to the side, I did not do chocolate chips. That is because 1/4 of my family is allergic to chocolate (oh horror of horrors!). :-(

I plan to use this recipe as a good base to add in anything I feel like, which I think will work really well because, other than the chocolate chips, it's a very basic recipe.

This time, for add-ins, I did 50% coconut shreds, and 50% chopped craisins.They are amazing! It also went really well with the coconut oil.

Some add-ins I'm planning on doing are: walnuts and a little extra honey; oatmeal; carob chips and craisins; dried apricot pieces; and sliced almonds.

For those of you interested in trying out the recipe, you can find it at TheCookieWriter.