DIY Summer Dress (With Tutorial For Making Dresses More Modest)
So I was shopping at a thrift store yesterday and came across one of the most beautiful dresses ever! It was long and Grecian, a beautiful fiery orange, and it fit pretty well too. There was only one problem... it wasn't quite modest. The front and back necks were low and awkward.
But was I going to leave it there?
No!!!
(Is that even a question? )
)
So I purchased it, took it home, admired it, put it on again, and put it back in the bag. And then this afternoon, I was in a bit of a slump. I had three really big writing projects, but my brain was like "I don't ever want to think about them ever again!!!" and went on strike. So I pulled out the lovely dress and a measuring tape, turned on one of my favorite podcasts, and got to work.
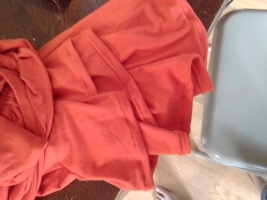
BUT FIRST... the "before."


AND NOW... the process.
In a world where it's hard to find a dress that (a) fits, (b) is cute, and (c) is modest, learning how to do some DIY sewing projects is a great skill to have! I took some photographs of the process in hopes that you can do this too.
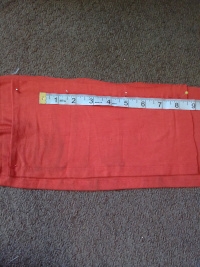
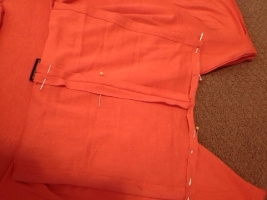
So I don't know if you noticed in the first photograph, but the dress is about 7" too long for me. Which is fantastic! The first step was to cut off the excess fabric (save it! It's important!), and sew a new hem.
PAUSE: In this tutorial, I'm assuming that you want the dress all the same color. That's why we're saving the bottom strip - because it can be used to patch up the front and back necks. If you don't want the same color, go find a scrap that has the same characteristics (same weight, same weave, hopefully the same washing instructions, etc). Or if you do want the same color, but don't have fabric to spare... good luck. A trip to the fabric store is definitely in order. Bring the garment along so you can get a close match, but getting a good one isn't guaranteed.

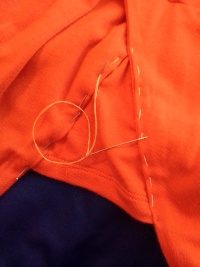
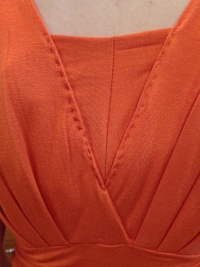
I didn't take enough pictures for this step... so... yeah. Take a square of fabric, about two inches taller and four inches wider than you will need to cover the low front neck. Fold in half and mark that vertical center line with pins. Unfold and place the right side against the wrong side of the dress (which should be insided-out at this point). Then, carefully keeping it centered, mark in place. Once you think you've got it, right-side-out the dress and take a look. Good? Fantastic! Take some more pins and pin the square from the right side. So you'll have two sets of pins in for a moment... then take out the ones that you put in while the dress was inside-out. Then, VERY CAREFULLY, try it on and take a carefully look in the mirror. Repeat the entire process until it's perfectly located. Then you can move on to the next step.
PRO TIP: when you're pinning the top of the insert, stretch the fabric a little. This will help prevent a gaping neckline, which is never fun.
Now you're going to remove the dress and baste the front insert in place. You can remove the pins now.

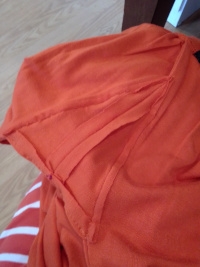
Now you can move on to the back insert! Measure how tall you need the insert to be and mark where the top will be with pins.
Now it's time to cut out the back insert. You're going to cut out two pieces, each one a few inches taller than you need and 2.5 inches wider than you need.
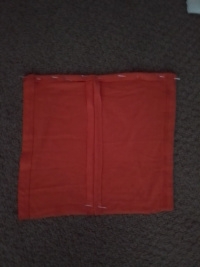
Put them back-to-back, right sides together. Sew a vertical seam about a 1/2" away from the edge. Pin a top hem, but don't sew or baste the actual seam yet.
Repeating the process used for the front insert, pin the back insert in place. Keep the seam centered.
Now baste the back insert in place.
PAUSE: make sure you can put the dress on over your head! If you can't, no worries, there's allowance for that built into the back insert. Remember that center back seam? If you need, you can unpick that and insert a zipper, or some hook-and-eyes, buttons, whatever. Just one thought: probably not Velcro. Now is the time to add in that back closure!
Now go to the sewing machine and sew in the front and back inserts over the baste stitches. If you've made sure you can get the dress on (including adding a back closure if needed), you can also hem the top part. Finally, trim the squares away about a 1/4" away from the seams. Assuming you're working with something that doesn't fray. If it does fray, I would trim the squares away about a 1/2" away from the seams, and then serge, bind, or hem them. Serging would be the least bulky option, I think.
And there you go! Now you have a cute dress that fits and is modest. Yay!
FINALLY... the fashion show


But was I going to leave it there?
No!!!
(Is that even a question?
)So I purchased it, took it home, admired it, put it on again, and put it back in the bag. And then this afternoon, I was in a bit of a slump. I had three really big writing projects, but my brain was like "I don't ever want to think about them ever again!!!" and went on strike. So I pulled out the lovely dress and a measuring tape, turned on one of my favorite podcasts, and got to work.
BUT FIRST... the "before."
with a shirt on underneath for modesty
AND NOW... the process.
In a world where it's hard to find a dress that (a) fits, (b) is cute, and (c) is modest, learning how to do some DIY sewing projects is a great skill to have! I took some photographs of the process in hopes that you can do this too.
So I don't know if you noticed in the first photograph, but the dress is about 7" too long for me. Which is fantastic! The first step was to cut off the excess fabric (save it! It's important!), and sew a new hem.
PAUSE: In this tutorial, I'm assuming that you want the dress all the same color. That's why we're saving the bottom strip - because it can be used to patch up the front and back necks. If you don't want the same color, go find a scrap that has the same characteristics (same weight, same weave, hopefully the same washing instructions, etc). Or if you do want the same color, but don't have fabric to spare... good luck. A trip to the fabric store is definitely in order. Bring the garment along so you can get a close match, but getting a good one isn't guaranteed.
I didn't take enough pictures for this step... so... yeah. Take a square of fabric, about two inches taller and four inches wider than you will need to cover the low front neck. Fold in half and mark that vertical center line with pins. Unfold and place the right side against the wrong side of the dress (which should be insided-out at this point). Then, carefully keeping it centered, mark in place. Once you think you've got it, right-side-out the dress and take a look. Good? Fantastic! Take some more pins and pin the square from the right side. So you'll have two sets of pins in for a moment... then take out the ones that you put in while the dress was inside-out. Then, VERY CAREFULLY, try it on and take a carefully look in the mirror. Repeat the entire process until it's perfectly located. Then you can move on to the next step.
PRO TIP: when you're pinning the top of the insert, stretch the fabric a little. This will help prevent a gaping neckline, which is never fun.
Now you're going to remove the dress and baste the front insert in place. You can remove the pins now.
Now you can move on to the back insert! Measure how tall you need the insert to be and mark where the top will be with pins.
Now it's time to cut out the back insert. You're going to cut out two pieces, each one a few inches taller than you need and 2.5 inches wider than you need.
Put them back-to-back, right sides together. Sew a vertical seam about a 1/2" away from the edge. Pin a top hem, but don't sew or baste the actual seam yet.
Repeating the process used for the front insert, pin the back insert in place. Keep the seam centered.
Now baste the back insert in place.
PAUSE: make sure you can put the dress on over your head! If you can't, no worries, there's allowance for that built into the back insert. Remember that center back seam? If you need, you can unpick that and insert a zipper, or some hook-and-eyes, buttons, whatever. Just one thought: probably not Velcro. Now is the time to add in that back closure!
Now go to the sewing machine and sew in the front and back inserts over the baste stitches. If you've made sure you can get the dress on (including adding a back closure if needed), you can also hem the top part. Finally, trim the squares away about a 1/4" away from the seams. Assuming you're working with something that doesn't fray. If it does fray, I would trim the squares away about a 1/2" away from the seams, and then serge, bind, or hem them. Serging would be the least bulky option, I think.
And there you go! Now you have a cute dress that fits and is modest. Yay!
FINALLY... the fashion show
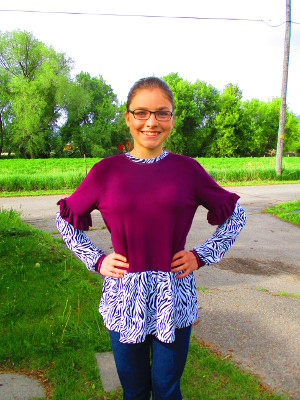
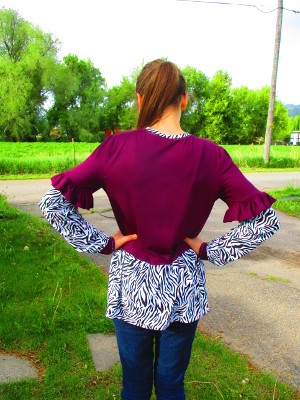
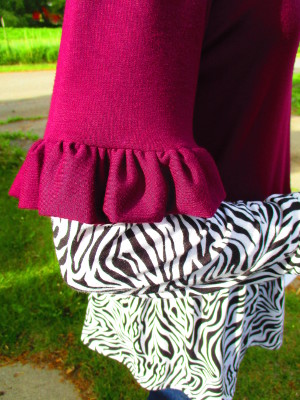


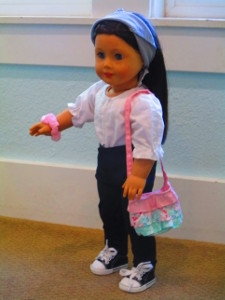
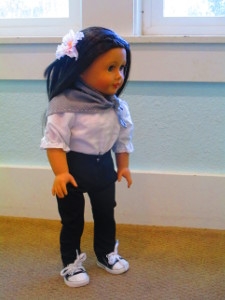
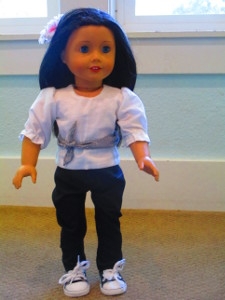


 But guess what... I found some more of that fabric, and used it to make this shirt!


